Wednesday 24 July 2013

A Twist on your Ballerina & Sock Bun

I've got another simple hair style to share, and I think there are many versions of it out there and you may already be familiar with it as it is very similar to a Ballerina's bun and I think its an easy cheat to the sock bun.

But just thought I could share my own version with you. It's really a pretty and very easy up-do, and it's also suitable for little girls. I would think that it would work for hair that is mid-back to long.

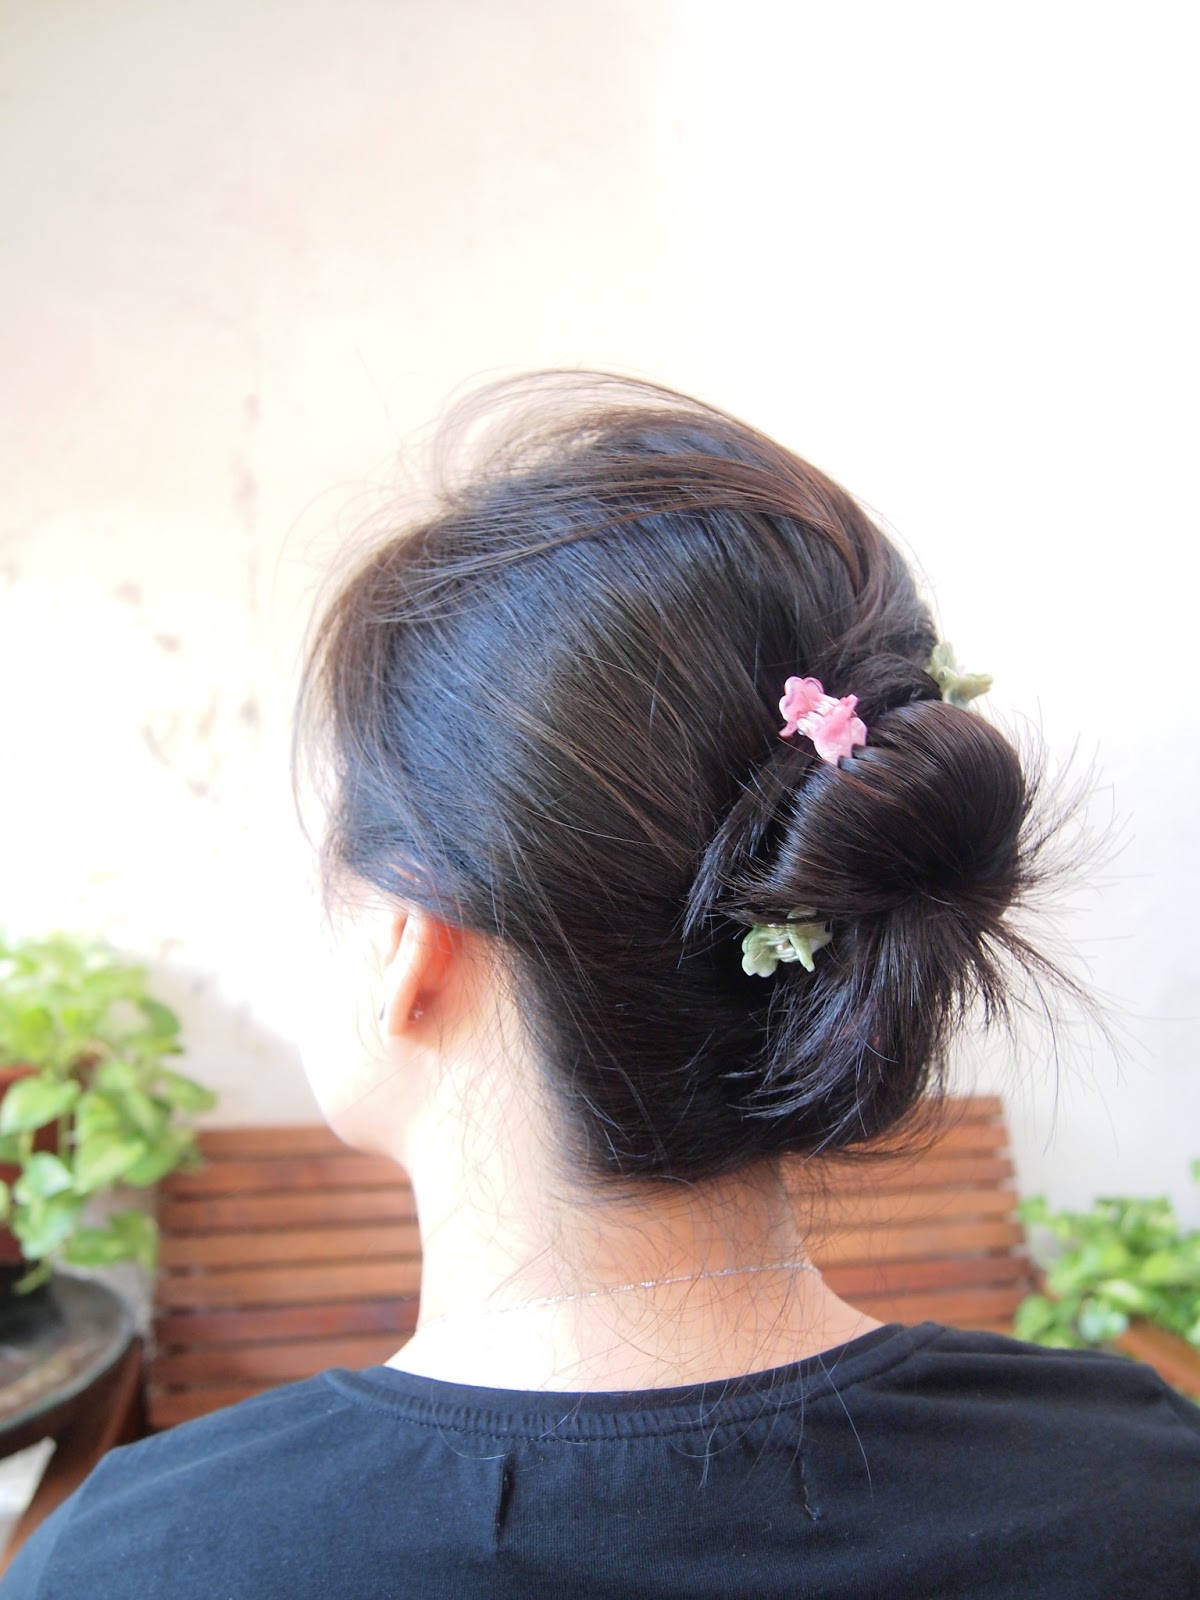
Here I use mini crocodile clips in candy colours! 


I love these little clips as they look so pretty and girly, and it can also work on little girls.


It's an easy up-do that you can use for everyday styles - school, work, weekend... 
So I did a little tutorial, excuse the video quality as I tried using my phone this time round..
Here you go!


In the video my hair is slightly damp after a shower, and I find it easier to manage with damp hair, but it also is still easy to do with your hair already dried.

Also I find that if you do it with damp hair and leave it on for a few hours to dry in the bun, when you let it down later your hair will be in soft and wavy curls - yay no heat curling!

So I didn't manage to get good pictures on the same day of the video, but here are photos of the same style with my hair already dried.


My hair is slightly layered, so because of the varying lengths, it can get unwound a bit which explains why some were sticking out of the bun, that's why I think with damp hair is easier as my hair stays in place better.


 I don't mind the hair coming unwound a little here and there as it is a very casual and easy look.
But if your hair is like mine and are bothered by it and don't want to bun up when your hair is damp, I would suggest using some hair oil.

Run through your hair with some hair oil with your fingers lightly [too much hair oil can make hair too sleek and greasy], and then create the up-do.


If you still find some hair coming undone, you can always add more clips or use bobby pins. Another way that I do this hair-do, is to use bobby pins instead of crocodile clips - it's the same direction just use pins instead.


Using bobby pins looks more grown up and you can transform the style to something more glamorous if you add on your preferred hair adornments.

But I used crocodile clips in this tutorial as it's easier to demonstrate the basic style.


You can also always have the bun higher or lower depending on your preference.

Hope you found this inspiring and useful!

Cheers,
E.L.

Friday 21 June 2013

A Staycation - Hotel Fort Canning Singapore

Few months ago, after the mayhem of the last show in 2012, my boyfriend and I had a mini staycation.

I needed to take a break so went online to hunt for good bargains at local hotels - which aren't much to begin with or rather, the bargains aren't really big ones because hotels and spas in Singapore are overpriced anyway. However with that said, it is mostly because our hotels and spas and resorts are actually really really of great standards - so it does translate to the cost.

Well, we found a pretty good deal with Hotel Fort Canning, and if anyone is visiting Singapore or if you are a local and would like to have a staycation as well, I would suggest it. It was a good price of SGD$200++, which is considered very good bargain in Singapore standards.

The hotel is beautiful, set in an old colonial building, which used to be the British military building in the 1920s - it is now preserved and updated as the hotel. The interiors are modernly designed and decorated, clean and smells so wonderfully good as you enter their main entrance - I love it when a hotel makes that kind of efforts to seduce all your senses! Staff were helpful and nice as well.

Their beautiful outdoor grounds are also very popular as a location for weddings. 


There were also complimentary drinks and canapes served for all guests during their stay in the lobby every evening at 6pm.

Drinks include their wide array of Nespresso - there is gigantic machine with all the coffee tablets available. Red and white wine are also served - canapes include cheese and crackers, mini quiches / bites etc.

This was a lovely touch to me, as I know many other luxury hotels elsewhere in the world do not provide this service.


The rooms are clean, modern and cosy - I felt it was a very clever use of the space. It's small, but because of the smart design, you have a luxurious bathroom in the balcony - the high ceilings makes it feel roomy too.

We were completely comfortable and relaxed in the gorgeous decor and comfortable King size bed. They also had a mini Nespresso machine with some complimentary coffee tablets available in your room - you may always call room service to top up more coffee.


 Hotel Fort Canning is up in the hill hidden in the middle of the city centre - it is among the lush greenery of Fort Canning park. So it's really different from staying in a hotel in the bustling city, it feels like you are away from the city and able to relax in nature.

So I went for a morning run through the Fort Canning park on my first morning. Ok, for those of you who are unaware, I currently still work and have been working at Singapore Repertory Theatre for the past 3 years, and the company does Shakespeare in the park here in Fort Canning. So I pretty much know my way around the park, but for those who have yet to visit, here are some photos I took during my run.


 All in all, I would say that was a very relaxing and wonderful stay, and if I do find a reason to need another staycation, I will definitely come back.

Cheers,
Emilia

Tuesday 18 June 2013

Sparkle! Sparkle! Work that Glitter! ~ E.L.

Trying hard to post consistently from now... I know it's been a long while since we posted a DIY, so here is a simple one.

I got myself the new Iphone5 and as we all know, with Iphones there are all these really cute and fun accessories. So I'm quite obsessed with iphone cases, even though the boyfriend would chide and say, "It's only one phone that requires one case" And ignoring that, I bought several.... It's a lot like the concept that a girl can't have too many shoes.

After purchasing a few, I realised I really wanted a more unique one, and that's when I decided to glitter-fy the old ones I have!

If you've been to kindergarten, then you should pretty much know how to work that glitter, so I hope I don't need to explain the steps in details...

Basically, you will need an old iphone case, lots of glitter in the colour of your preference and glue.


So I preferred using my Inkssentials Glossy Accents as my glue, because it dries glossy and it's far more durable than normal glue. I tried with Modpodge but I didn't like the effect it gives after it dries - it kind of dulls the glitter effect. Inkssentials Glossy Accents dries glossy but if used too much it will also dull the glittery effect, so use sparingly. I also find that after a few use of the glittered case, the adherence is better as the glitter doesn't fall out in comparison to other glues. 

I used some really cheap glitter I got from a stationary store for my blues and greens, and the onyx black glitter was a gem from Martha Stewart's craft.I love Martha Stewart's glitter, it was so fine like powdery sand and it was just as glittery!

Anyway, so let your kindergarten-self go creative on your phone case - just put a thin to medium layer of the glue on the case and sprinkle the glitter all over it. Let it sit then tilt it to get rid of all the excess glitter, only the ones stuck to the glue will remain on the case. 

And Voila!
I made one on a plain transparent cover with black glitter, and another was a green-net cover with my blue-green glitter.


I still had plenty of glitter left over that I decided to glitter-fy my old sunnies too!

So hope you're inspired to try out your own glitter projects too!


Cheers,
E.L.


Monday 17 June 2013

A Well-loved Sock Cat

Remember the sock cat I made a year ago for S.T.?
If you can't, here's a link back to the previous post on the sock cat I made with a tutorial link for it.

So if you're wondering the fate of this sock cat, which S.T. has named Chester, here are some clues...


It is now well-loved by S.T.'s real kitty, Jax! Apparently the kitten grew very attached to the hand-made soft toy since it was adopted by S.T, and now they're inseparable!

Through sickness and in health...


As you can see, the sock-cat has withstood quite a lot and yet it has remained intact! Trust me, I'm very surprised and impressed at my own hand stitching!


Thanks to S.T. for sharing the cute photos!

Cheers,
E.L.


Sunday 28 April 2013

Instagram-ing our little lives!

Hello all! Our greatest apologies for the long hiatus!

It seems we have been absent for months, and I am truly sorry for my own sloppy commitment to blog. I'm going to try my best to write more often!

Anyway, I hope everyone is doing great and having a wonderful 2013 so far. Mine has been quite a whirlwind, and pretty much going through some huge changes. And I'm happy to say though, that at least S.T. is having a better year! :-)

So in our absence, we have actually been active on mobiles instead. We have been instagram-ing our lives! So for any of you out there who has been so faithfully following us despite our neglect (which I promise will change!) and are curious to see what we are up to in our daily lives, do follow us!

FOLLOW S.T. @eneres_nat


And FOLLOW ME @emilialew


For S.T., she mostly instagrams her life in Shanghai, her new kitten and her cooking and craft! So look through her photos on sights around the great city. As for me, its mostly photos of the things I do, and places I go, and people I love, and just people and things I see.

Hope to see you on instagram, and will update here with some selected photos off instagram as well!

Cheers,
E.L.